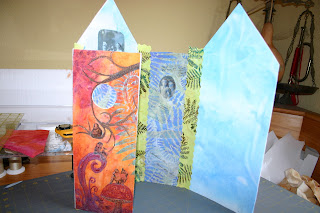
Challenge fabric! So Juicy, It took me many months to finally decide what to make. I knew I wanted to use my new textile paints. I looked at many different ideas over the months; flowers, journals, or a 3-dimensional project. But I had a suspicion that one of my "challenge mates" was making some flowers( ha ha I was right!, click here to check it out)
So here is my Inspiration. I wanted to try out these 3-D houses, I had seen on this blog , and I already like "houses" see my rustic houses previously posted, Hmmmm with some photo transfers threw in the mix, my new textile paints, the great background fabric, and some other mixed media supplies (hand cut stamps, painted dryer sheets, Arizona ice tea can).
It was soooo fun to paint this whole cloth, I did lightly outline the freezer paper templates I had made for the house, so important parts of the painting would be placed properly
Construction
I left strips of the painting in between the cut out pieces to use later for the binding.
Here are the walls of the house.
Next I fused the pieces to the heaviest double-sided fusible interfacing I could find, I found Peltex
Next photo transfer with gel medium
Spread a thin layer of gel on the cutout photo, press onto the fabric and let dry.
After the gel drys you will peel and rub layers of the paper off, dampen rub, let dry, repeat, when it drys if it looks whiteish that means there are still paper fibers, rub some more. I use a old battery powered tooth brush to blast the last bits off ( don't go to crazy the transfer will start peeling)

Another tip for this transfer process is be aware it is transparent so you will see what is behind the picture. Also I always do some tests with different kind of printer paper and ink, if the kind you use first doesn't work try a different paper. I have to use a heavyweight matte presentation paper (Epson), with my printer.
Strips layed out ready to trim and fuse
Remember the strips I saved between the cutout walls, I fused them and trimmed to match up with the branch's on the walls. I did use a sheet of parchment to protect the iron and painting.
This is the inside with photo transfer, fused and reinforcement strips .
The window cut outs will allow the photos to be viewed.

Next the roofing -
Love it!!!
I get to use my new wavy cutter for the roof edges.
Top stitched and thread painted the binding strips to blend the branches
This small travel iron worked great to fuse the last wall joint.
Inside
Glued the roof on with gel medium and a heavy book to keep tight while it drys.


Great post Kathi.......it was great to see the process of creating the 3D house.
ReplyDeleteThanks!
LuAnn
I Love this. This is similar to what I want Dave to paint for me.
ReplyDeleteKim
Beautiful Kathi!
ReplyDelete:) Marnie